SURE SHOTS MAGAZINE

ARCHIVE - ISSUE NINE - OCTOBER 2014            COVER   -   FEATURED PICTORIAL   -   TRAINING   -   LIFESTYLE   -   REVIEWS            ARCHIVE - ISSUE NINE - OCTOBER 2014 

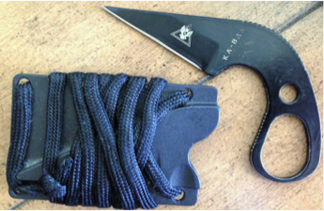
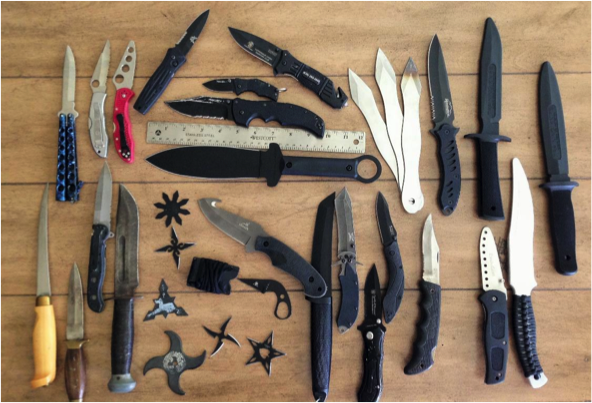
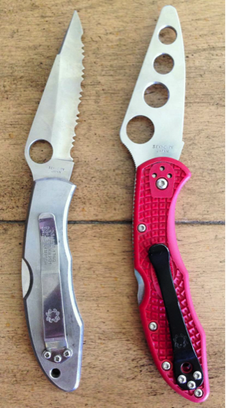
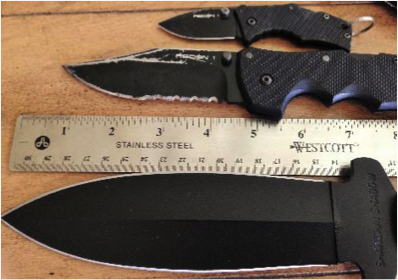
KNIFE AS A DEFENSIVE TOOL
by Auristela Moctezuma

Picture
Knife as a defensive tool? Absolutely! My philosophy is anything and everything can be used as means to defend and protect yourself. If you have a CCW/CHL and you carry a firearm 24/7 or when/wherever you can, why not carry a knife as part of the tools you use for personal protection? Knives can also be a good option for staging your house—of course, people with children should always be mindful of safety and accessibility when staging. 

Some may ask, “Why take a knife to a gunfight?” While this is a valid question, not all attacks involve a gun. What if the attacker uses their hands and you cannot access your firearm, or the situation only allowed for knife deployment? How would you protect yourself if you choose not to carry or the location prohibits you to have your firearm? I once heard an awesome firearms instructor talk about the difference in training for possible, plausible, or probable situations.  As I recall the seminar, he pointed out the difference between these three types of situations. How likely are you to run into a possible situation like a “zombie apocalypse” on an average day? Plausible situations would be something like a bank robbery, while a probable situation could be an assault to get your keys, cash, purse, etc. Therefore, it is more efficient to focus your training for the most probable situations. I took this to heart and chose to focus my training in the most probable situations to be able to protect myself whether with a firearm or using my knife to defend or fight. 

Picture
Picture

Knife Training
Just as you became intimately familiar with the firearm and the laws on where you can and cannot carry, you will need to do the same with the knife you choose to carry. What this means is you need to train in the deployment of your carry knife, as well as how to use it so that you can defend yourself should you need to. My thoughts are you do not want to be done with your training after just taking one basic intro class. You want to continue your training so you can continue to evolve in your skillsets. 

One of the biggest concerns when it comes to training, is how do you choose an instructor or class to attend? Again, just as you did with the firearms training classes you have taken, you want to get referrals and do your research. I feel it is important you are able to connect to the instructor’s teaching methods so you are able to get the most out of the training. After all, everyone learns at a different pace and not every instructor has the ability to connect with each student.    

One thing I have learned and try to relay to my students, is train as you would be in everyday clothing and at your comfort level, especially for beginners.  You want to be able to take what you have learned in class and be able to practice it and use it should you need to.  As you advance in your skills, you will want to get out of your comfort zone and become more assertive.

You will want to have the proper knife for training and practicing—meaning, once you have chosen your carry knife, most manufactures will offer have the exact knife as a trainer. This way you are safely practicing your skills with the same knife you carry, as seen in the picture above this is a Spyderco knife on the left and its trainer on the right. With this trainer, you can safely practice deployments and defensive moves without hurting yourself or your training partner. Some other protective gear you may want to have as you advance in your skills for training are forearm guards, safety glasses or an airsoft mask and some MMA gloves or gloves that will protect your knuckles. 

Texas Knife Laws
Penal Code Chapter 46 Sec 46.01 

"Illegal knife" means a:

(A)  knife with a blade over five and one-half inches;

(B)  hand instrument designed to cut or stab another by being thrown;

(C)  dagger, including but not limited to a dirk, stiletto, and poniard;

(D)  bowie knife;

(E)  sword; or

(F)  spear.

(7)  "Knife" means any bladed hand instrument that is capable of inflicting serious bodily injury or death by cutting or stabbing a person with the instrument.

Picture
Different cities have different ordinances. For example, here is San Antonio's:

San Antonio City Ordinance - Sec. 21-17. 
Certain knives prohibited generally; exceptions; penalty for violation.

(a)    It shall be unlawful for any person to intentionally or knowingly carry on or about his person a knife with a blade less than five and one-half (5½) inches in length, which knife is equipped with a lock mechanism so that upon opening, it becomes a fixed blade knife.

(b)   The above prohibition set forth in subsection (a) shall not be applicable to a person carrying such a knife:

(1)    In the actual discharge of his duties as a peace officer, a member of the armed forces or national guard, or a guard employed by a penal institution;

(2)    On his own premises or premises under his control;

(3)    Traveling;

(4)    Engaged in lawful hunting, fishing or other lawful sporting activity; or

(5)    Using such a knife in connection with a lawful occupation, during such utilization.

(Code 1959, § 26-28.1)

Cross reference— Regulation of firearms and weapons, § 21-151 et seq.; possession of a knife, § 21-155

Auristela (Stela for short) is the owner of Stellar Tactical LLC. She is a licensed Personal Protection Officer, licensed Private Investigator, Patriot Apache Knife Fighting Instructor, and an NRA and Texas CHL firearms instructor. Some of the other training and skills she is proficient in are: Israeli Counter Terror Warfare – IPTT Basic Pistol, Urban Warfare Tactics, IDF Hand Cuffing, Israeli Tactical Knife Training (ITK), HaganaH, Combat Focus Shooting, Arnis Stick Fighting, and Patriot Apache Knife Fighting System. She is also a Combat Fitness Coach and TRX Suspension Trainer.


Check out the Austin Sure Shots web store!

Picture
You can pick up one of our new Austin Sure Shots sugar skull shirt!
Plus - totes, patches, and much more!

Practical Know-How:
Concealed Carry Techniques Course
by kXb

PictureStudents practice drawing & shooting from a wide variety of carry methods.
I had my CHL for over a year before I finally found several different ways that I could comfortably and safely carry my weapon with me.  While I was indeed carrying daily, I was not yet brave enough to carry with a round in the chamber. I was also intensely aware of the presence of my weapon and the fact that I had never practiced drawing from cover.  How was I supposed to get to the point where doing that didn’t scare me more than the reason for which I would need to do that (as in to save my life)?  I most certainly didn’t want to wait until that highly charged moment to try it for the first time!  I had to find a way to practice.  That is not an option at your friendly neighborhood gun range (big sign saying NO DRAWING FROM HOLSTERS is your first clue).  Well, someone must have read my mind because BSG Security Services paired up with Austin Sure Shots to put on a ladies only Concealed Carry Technique class.  I signed up immediately and placed it in big letters on my calendar.

The day finally arrived for the class and I made my way to the gun range with my gear bag in tow wearing my everyday carry clothes (jeans and a loose fitting shirt).  After the instructors, Kent Morrison and Niki Jones, introduced themselves, we were each asked what we would like to get out of the class.  I mostly wanted to get to the point where I was not a nervous wreck carrying a loaded weapon on my body.   Speaking of nervous, I was seriously jacked up!  I was nervous that I might shoot myself somehow, or worse, shoot someone else.  I was nervous that someone else might shoot me.  I was nervous I wouldn’t be able to hit the broadside of a barn even though I am experienced with my gun.  

I nervously tried to put all of that out of my mind while we went through the stringent gun safety basics, range rules and terminology (admin reload, tactical reload, indexing, OODA [observe, orient, decide, act] loop, etc).  We then sauntered out to the targets with our loaded guns, spare mags, and various carry choices.  Our first exercise was explained in a detailed, step-by-step fashion.  We were to slowly pull from cover, cock or clear safety, fire a few shots, scan, and re-holster.  We jumped right in with a slow count of 1-2-3 draw-cock-fire, scan, reholster.  The sequence was repeated as we gradually got a bit faster with the count.  This same level of explanation and slow progression was followed throughout the day all the while emphasizing safety.  There was always ample opportunity to ask questions and/or modify our carry position if desired.  

I soon realized two things: not carrying a bullet in the chamber and drawing from a purse really hampered my ability to quickly get to the target.  After Kent showed me how difficult it would be for my weapon to fire without a finger on the trigger, I graduated to having one chambered and then went to my on-the-body carry position.

Next, we built upon that by interrupting an attacker’s OODA loop by doing something they might not be expecting:  moving.  We serially tried stepping to the side, dropping to a knee, and backing up prior to firing.  This was referred to as moving off the x.  Again, full explanation of the exercise ahead of time followed by slowly performing the exercise in sequence building up speed as we repeated.  For an up close encounter simulation, we practiced adding in a quick chest or face strike with a loud “BACK OFF!!” for good measure.  We continued to practice the same sets of exercises but using only our right hand and then again using only our left hand.   

The day was interspersed with breaks under the pop-up tent for water, food and discussions.  One of the most memorable discussions described how quickly an attacker can bridge a distance of 21 feet in order to get to you (would you believe 1.5 seconds?!).  This was demonstrated on the range.  Person 1 stood facing the target with her weapon concealed.  Person 2 stood by her side facing the opposite direction towards the tent.  With no warning, person 2 took off running towards the tent.  Person 1 pulled from cover and fired a shot at the target at which point person 2 stopped.  In almost every single case, the runner made it farther than 21 feet before a shot was fired.   

Our last exercise of the day was an expansion of all our other drills.  We started close to our paper target, made a quick chest strike and shouted “BACK OFF”, moved off the x, drew our weapon and fired as we backed up to cover.  Under cover we had to hit a steel target to the left and right of the paper target.  We then continued to back up to two more sets of cover hitting the steel targets from an even greater distance reloading when necessary.

At the end of the day, the instructors asked whether our expectations had been met and whether we had any suggestions for improvement to the class.  I was exceedingly satisfied with the class.    I finally got beyond my fear of chambering a bullet while carrying and I most definitely feel more comfortable and confident carrying on my body.  My only suggestion for improvement was to offer the class during a cooler time of the day or year.   Outdoors in Texas in July is just sweltering, especially when you are wearing jeans.

Find out more about training with BSG Security Services by visiting their website: www.bsgss.com


Realism, Fire Drills
by Kanani Fox

Picture
Remember back when we were kids in school?  Once a year there would be a fire drill, when we were led outside to the playground, check to be sure everyone was accounted for and then file back into class.  I don’t know of many school aged children who took it seriously.  It was a break in the monotony of our math lessons and a chance to see our friends in another classroom.  These fire drills are meant to practice the school’s emergency plan in the event of a fire at school. What if the drill included the smell of smoke or the sound of emergency vehicles?  Would we have taken the situation more seriously?

Practice time shooting at the range is no different. To get the most out of our time and ammo, we should challenge our effort as if we were role-playing our emergency plan.  We don’t want to simply go through the motions lazily like when we were kids walking in line for those fire drills. Once we have mastered the fundamentals and our shots are consistent, increasing the level of complexity or adding a source of stress to our practice is the next step.  Stress adds realism to your shooting experience.  When controlled carefully, a small amount of pressure while shooting can benefit you exponentially when a real emergency occurs. 

For a new shooter, just thinking about the fundamentals you need to perform is enough to add a sufficient amount of pressure.  Competition between friends for a higher score or the loud bang of a rifle in the shooting stall next to you can take you off your target.  In fact, changing the location of the range or even the firearm used produces a high level of anxiety with a new shooter.  Learning to work within those parameters is a great place to start.  With more experience, one would not be as easily affected by these circumstances.

Let’s take it one step further.  Last month I became certified as an Instructor to teach the NRA course Personal Protection in the Home.  One of the training exercises was to first shoot a group of six shots “leisurely” hitting the center of the target.  There was no time constraint, no rush, just shoot at your own pace.  We marked our grouping and were instructed to shoot two shots as fast as we could, successfully placing them in the same area as our previous ones.  Our instructor timed us and called out our missed shots, driving us to go faster and faster.

Even this small amount of pressure, which I was not accustomed to, revealed several things.  Increased heart rate, a tendency to jerk the trigger and rushing to make the shot indicated my level of anxiety.  The addition of a harmless timer and the mild embarrassment of missed shots being exposed for all to hear were more than enough to degrade everyone’s performance – especially mine.  However, each successful pair solidified my confidence and experience under these conditions.  I knew what to expect and every effort became more natural than the last.  After the first few drills I began to relax and the startled feeling from the clock didn’t affect me as it did on my first few attempts.

Working through malfunctions and reloads at top speed will certainly improve your response time until you are no longer thinking about shooting, but simply shooting.  Recording your speed on these tasks will give you a baseline and show your progress.  Any demonstration of skill requires some amount of pressure in order for us to improve.  Our end goal should be to establish the muscle memory and mental stamina to offset the body’s natural reactions in an emergency.    Think back at your school’s fire drill, the goal was to get you out of the building safely, quickly and, most of all, calmly.

In addition to being the founder of the Central Coast Ladies Shooting Club (CCLSC) in her hometown of Santa Maria, CA, Kanani is an advocate for the second amendment with local radio listeners as co-host of “On The Firing Line with Joe, Matt and Kanani”.  She is a NRA Instructor and is trained to teach Certified Pistol and Personal Protection in the Home. Kanani is extremely enthusiastic about teaching women to defend themselves, their families and to enjoy the sport of shooting.

Picture
Picture
Picture
Picture
Picture
Picture
Picture
Picture
Picture
Picture
Picture
Picture
Picture
Picture

Short Range Marksmanship by Alex Griffith
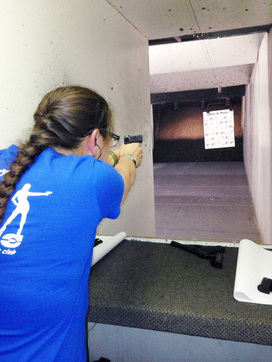
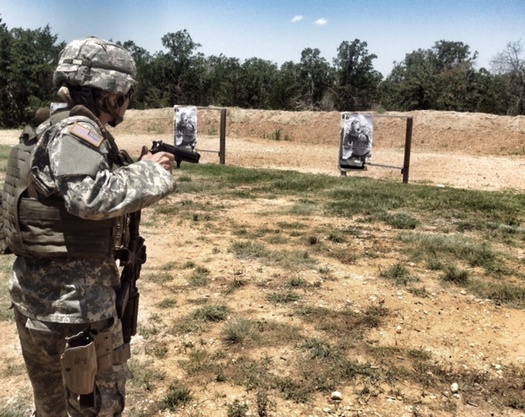
PictureDot drill - 25 yards
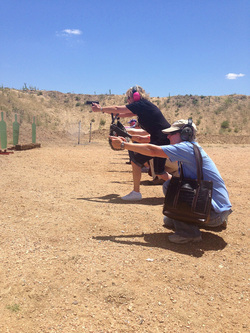
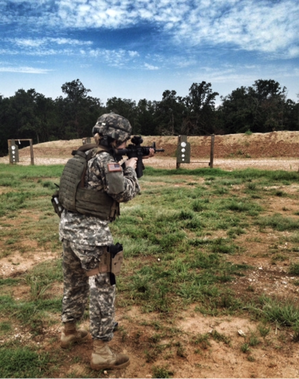
One of the reasons I joined the National Guard was so I could get into some of the fun courses the Army offers – courses like Short Range Marksmanship.  It’s a 5 day  course incorporating carbine and pistol work from distances within 25 yards.  Most of the shooting was from the 3, 7, and 10 yard lines.  

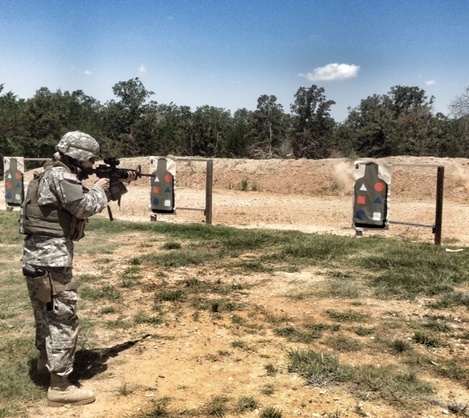
The course starts with zeroing the carbine and establishing a baseline of accuracy.  The overall goal of the class was to get all your shots within a roughly 8” circle while going as fast as you safely can.  I’ve done a lot of shooting in matches under time constraints, but this was the first true tactical course I’ve taken where a lot of the emphasis was on going as fast as you safely can while maintaining effective hits on target.   

But before you can go fast, you have to learn how to aim, and for that we worked on the dot drill.  This drill consists of a target with four dots painted on it in a vertical line.  The dots get smaller from top to bottom.  You start at the smallest dot at the 3 yard line, and gradually move back to the 7 yard line.  As you move back, you aim at the second from the bottom dot.  When you move back to the 10 yard line, you shoot at the dot third from the bottom.  At 15 yards, you shoot at the top dot. With a rifle zeroed at 25 yards, as you move closer, you’ll have to aim high on the target to hit it.  The dot drill teaches you how to judge that holdover. 

The course thoroughly covers reloads, both administrative, which you use when you have the time to retain the partially loaded magazine, and emergency, when the firearm goes empty and you have to get back in the fight quickly.  I’ve never had to do fast reloads with a carbine before, so this was all new to me.  The technique the instructors taught is easy to learn, and fast to perform.

Keep your head up, maintaining awareness of what’s going on around you, as you reload your firearm.  When your bolt locks back empty, drop the empty magazine as you reach for a new magazine with your support hand.  Feel the top of the full magazine – you should be able to tell if the round is sitting on the right or left side of the magazine.  Firmly push it into the magazine well and then pull on it to make sure it won’t fall out, and hit the bolt release.  Release the magazine and feel the top round again.  This time it should be on the opposite side it was on before.  This is how you verify that a round is in the chamber.  Insert the magazine again, pushing and pulling like before, and you’re ready to go.  With practice, you can complete this reload in a couple seconds without once having to look at your carbine. 

As the week progressed, the drills got harder.  We covered the various stoppages that can happen to a carbine, and how to correct them.  If you don’t have time to correct a malfunction, or reload an empty firearm, you can always transition to a sidearm, so we worked on that too.

One of my favorite drills combined all these techniques.  You start with one round in your carbine and a magazine with 2 rounds in your mag pouch, and one round in your pistol, with an extra magazine for that firearm as well.  At the command, you fire one shot with your carbine, perform an emergency reload and fire two more rounds.  When the firearm goes empty, you transition to your pistol.  Again, you fire one shot, quickly reload, and fire twice more. 

To make it even more challenging, we started moving while firing.  We moved forward, moved back, and practiced turning to face targets to our side or rear.  We used the box drill to practice moving, shooting with our non dominant hand, and target discrimination. 

The last day of the class, we ran through a barricade course where we had to implement use of cover and shoot with our non-dominant hand

The class had a high round count (about 2000 rounds per shooter) and challenged each shooter to push their personal limits as far as they could.  Some of the students in my class had never fired a handgun before, but by the end of the week they were getting all their shots quickly into the strike zone.

If you ever get the chance to take a class that combines two different types of firearms, take it.  Many of the skills involved in shooting a pistol transfer over to rifle shooting, and vice versa.  I guarantee you’ll learn a lot, and probably get to try some new fun drills.

Picture
Picture


Picture
Picture
Picture
Powered by Create your own unique website with customizable templates.